So the back of the camera which will take the film holder is all done apart from painting. The next jobs are to make the body of the camera and then the front plate which will hold the pinhole and the shutter.
The plan for the body is a simple open ended box made out of 6mm thick MDF which is glued together and then reinforced by gluing fillets of 8x8mm pine. It’s easier to show you a picture than it is to describe it.
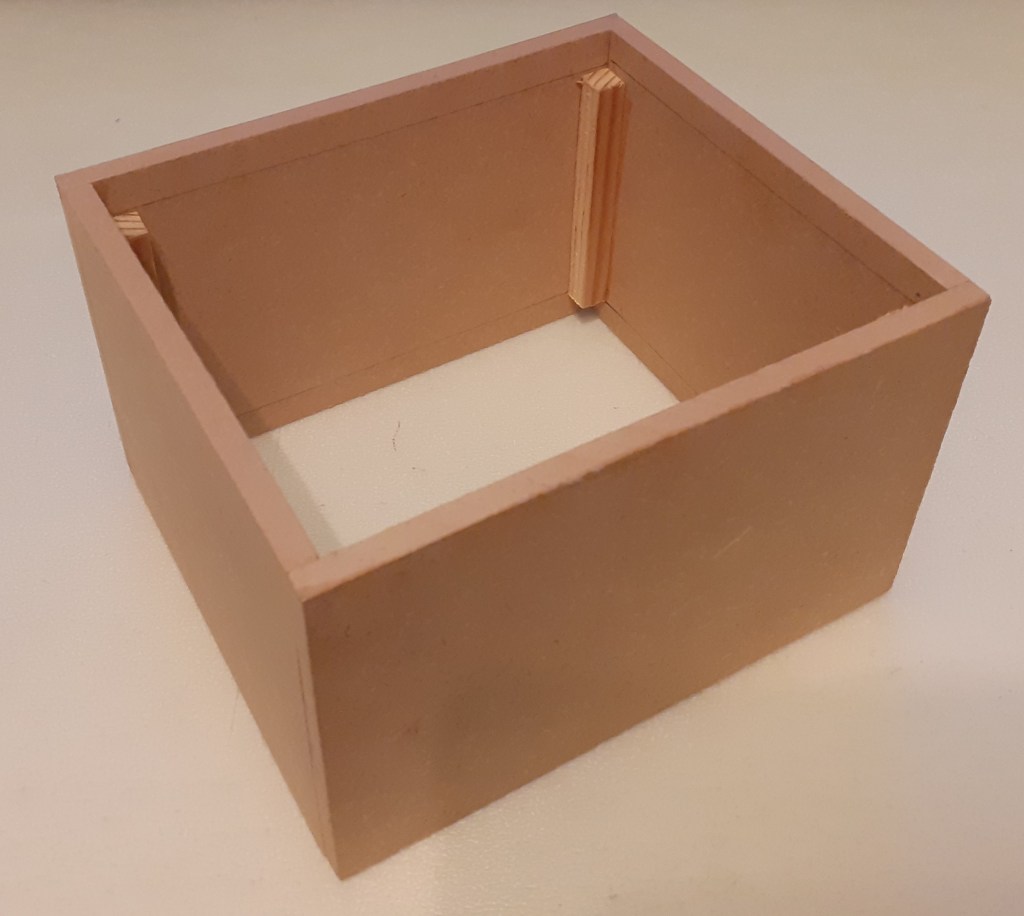
The sides of the box were cut to length to fit into the light trap that I had previously glued onto the camera backplate and the fillets were cut short so that when glued in place would clear the light trap. In my case the MDF was cut to 150x96mm and 118x96mm. When gluing up the most important thing here is to make sure that the box is completely square in all dimensions. Once the glue was completely set I sanded both open ends on with a sheet of glass paper taped to a flat surface. This is to make sure that I get a good light tight seal with the front and back plates
The fact that I used 96mm wide MDF (which I just happened to have) means I will end up with a focal length of around 100mm which I estimate equates to an equivalent focal length of 28mm for a 35mm camera, so wide angle but not extremely wide. The plan here, if you remember, is that I can swap out this middle section and the pinhole for others to alter the focal length. In fact I also made a second body in exactly the same way and using the same materials except the mdf was 71mm wide giving me a focal length of 75mm. This equates to an equivalent focal length of 21mm for a 35mm camera.
Next the front plate to hold the pinhole and the shutter. Based on the external size of the back plate light trap a piece of plywood was cut to 170mm x 150mm. A light trap was then glued onto it using the same materials as before making sure that the centre box fitted.
I planned to glue the pinhole (yet to be made) onto a large square steel washer (45x45x2mm) to give it some rigidity and then mount it onto the front plate. To provide a mounting I glued thin strips of wood (just slightly thicker than the washer) to form a three sides of square and then glued wider strips of thin wood to hold the washer in place. Note that I had to cut away the edges of the holder to allow me to remove the washer from the mounting. A hole was then drilled part way into the front plate so I could push in a wooden peg to lock the pinhole in place

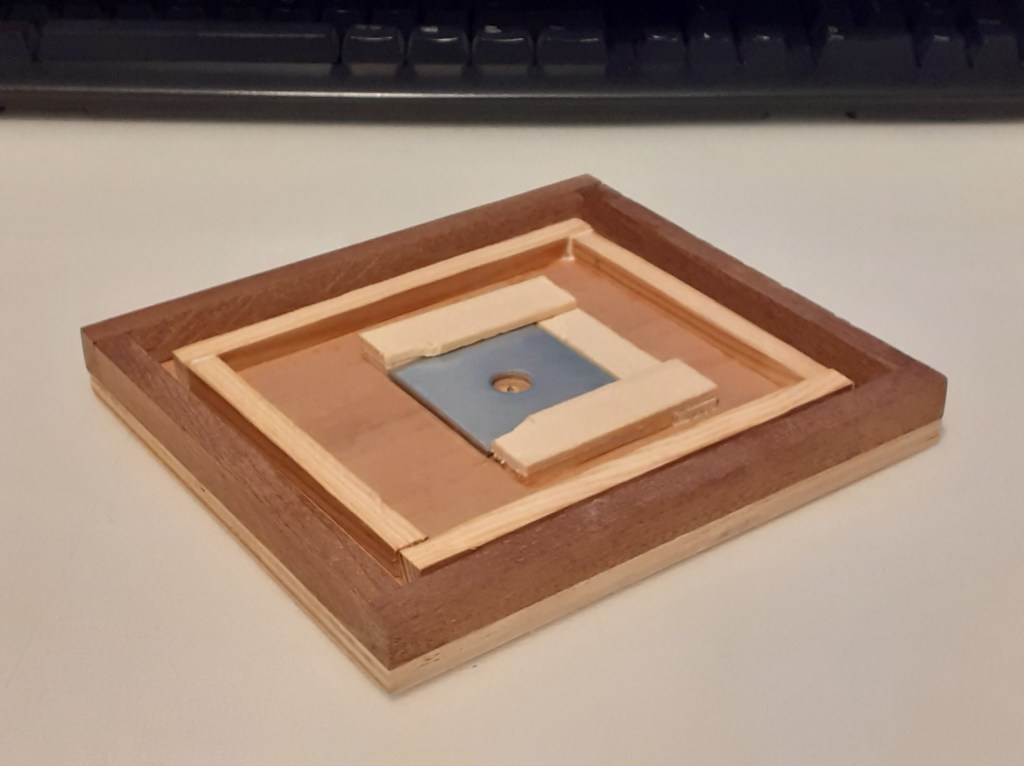
The centre of the front plate was marked and drilled to give a 20mm hole. The hole is this large to make sure that there is no vignetting of the image as the pinhole itself is to be mounted on the inside of the plate.
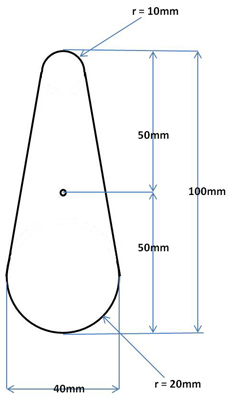
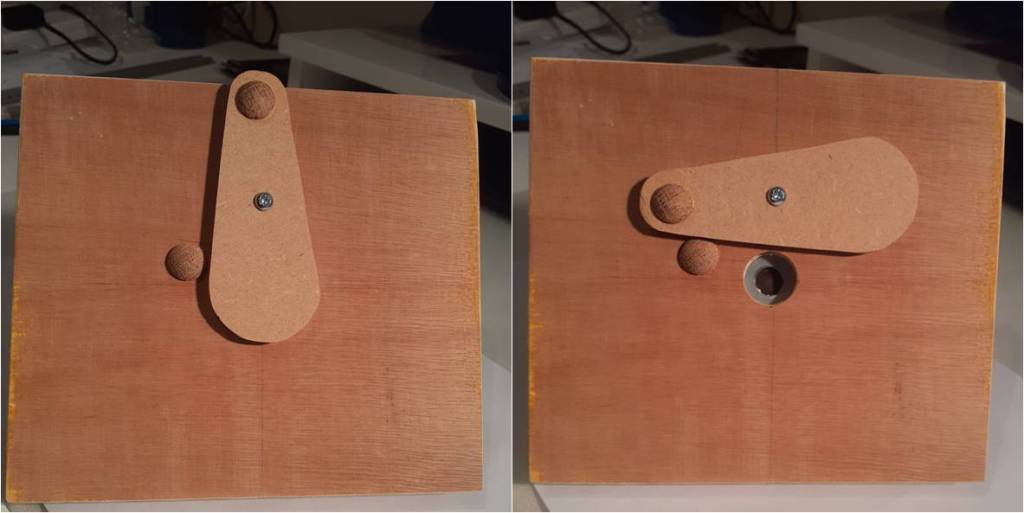
Finally I cut the shutter out of 6mm MDF according to the dimensions below. After gluing some felt to it, this was fixed to the front plate with a screw to provide a pivot and wooden stop to set the fully open and fully closed positions.
My decision to make a camera where I can change the focal length and pinhole has made this build more complex than otherwise. If you were happy with a single focal length and pinhole you could fix the pinhole to the front plate with glue or tape and then dispense with the light traps and just glue all three parts together to form a rigid box.
The completed front plate looks like this:
Next time I’ll make the pinhole.
