For quite some time I’ve been pondering over making my own 4×5 large format camera out of wood. As well as an interest in photography I also enjoy woodworking and have some suitable tools so it’s not unreasonable that I should combine two hobbies.
There are lots of examples of other people doing just the same to be found on the internet but the main issue for me has always been the cost of lenses for large format even second hand as I basically don’t like spending a lot of money on things just to try them out.
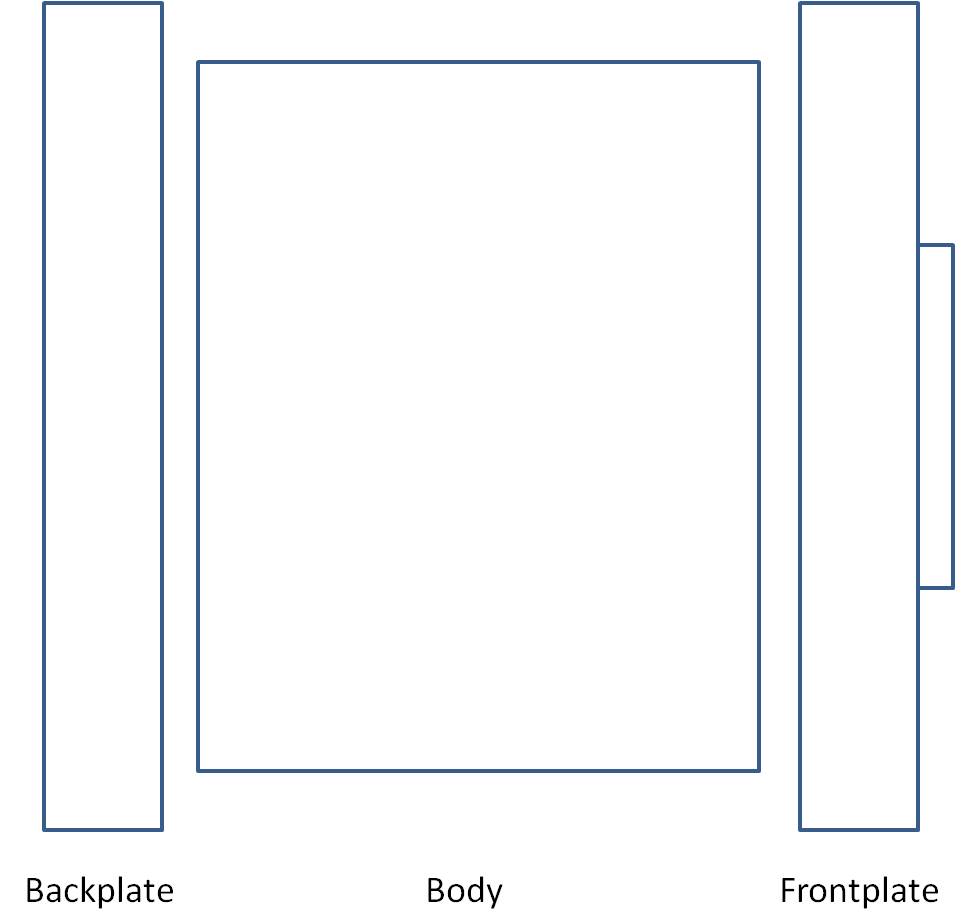
So instead I started to look at pinhole cameras. The advantage of pinhole photography is that there is no focus mechanism to worry about and so the level of accuracy (and therefore skill) is significantly less. Again there’s a lot of information out there but to my surprise not that much in the way of plans. So I decided that I would have a go at making my own camera and try to document it so that anyone else could do the same if they wanted to. The design I had in mind was a modular one consisting of three components: a front plate to hold the lens (pinhole) and shutter, a centre section which would define the focal length and a back plate to take the film holder.
I would fit light traps at the junctions between the modules and the pieces would be held together with elastic bands (no hi-tech here although I did consider magnets). Being a modular design would mean that I could change the focal length by changing just the centre section and pinhole without having to remake the front and back plates which are a bit more involved.
My first step, since I had decided that I wanted to build a 4×5 camera was that I needed to know the dimensions of a 4×5 film holder. (I don’t have the facility to enlarge these negatives but I imagined I could either contact print them or scan them on a flatbed scanner and then print them out using an analogue/digital hybrid workflow).
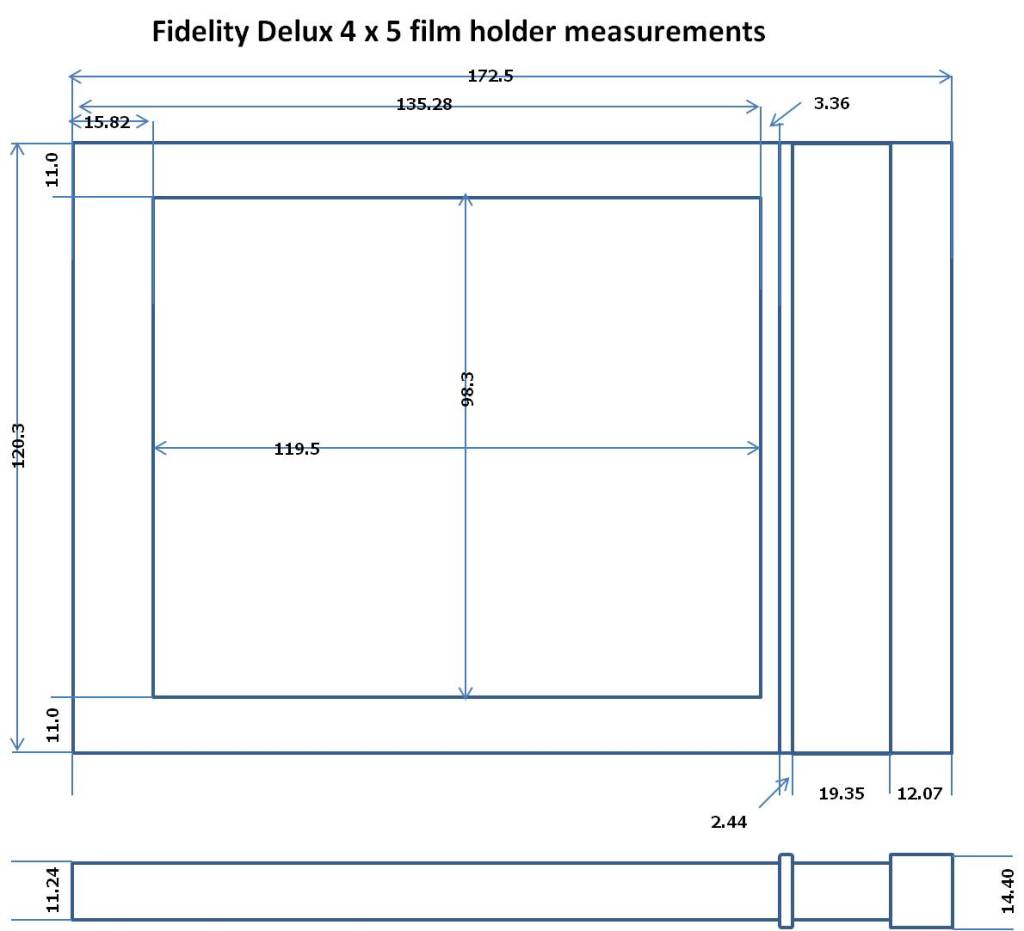
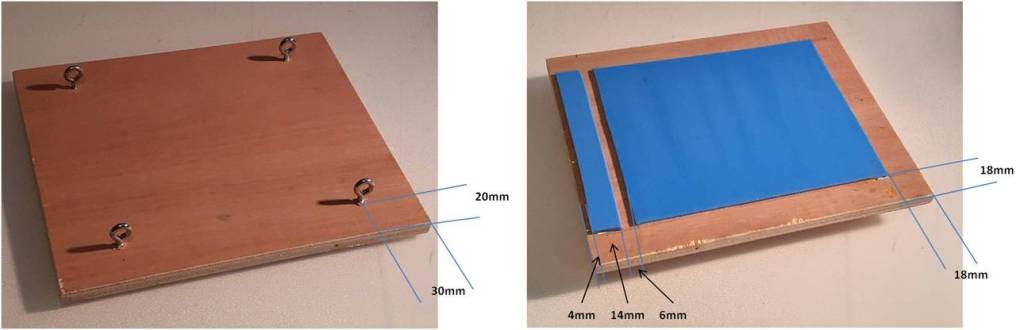
A look for dimensions of 4×5 film holders on the internet was not that forthcoming though some forums did give a few details, so I purchased a Fidelity Deluxe film holder second hand for £18 and measured it for myself. The measurements I took are shown in the diagram below, please note however, the measurements were taken using a fairly cheap digital caliper so I can’t guarantee absolute accuracy but these are the measurements I’m going to use for my build. All measurements are in mm.
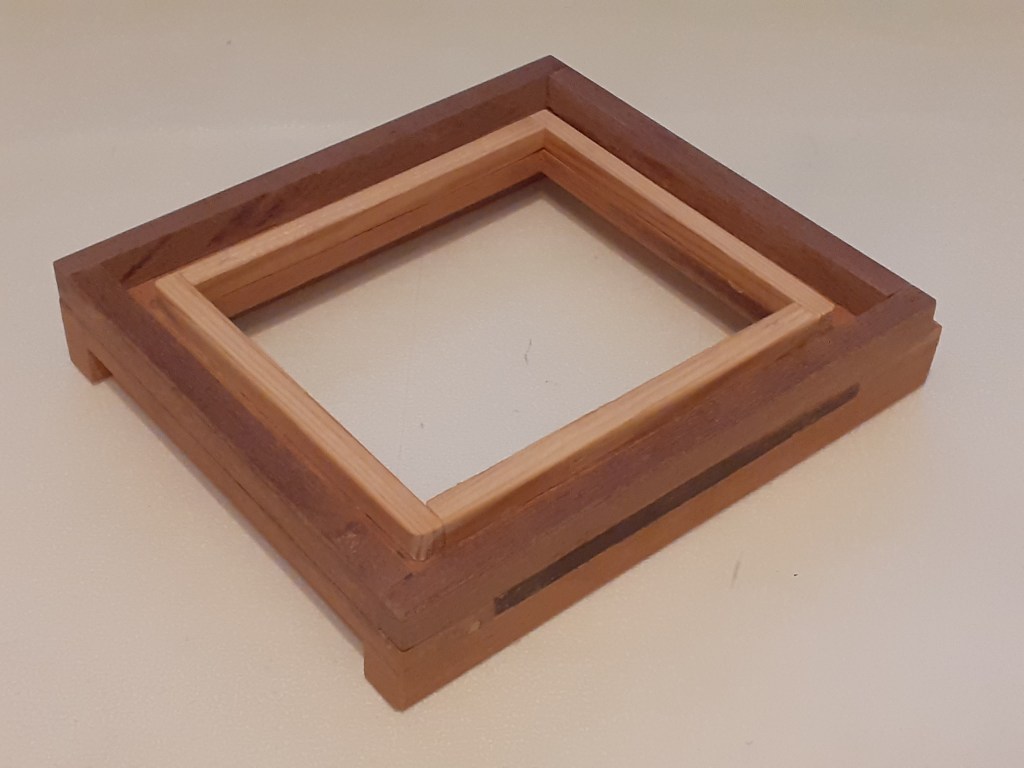
The next job is to design and build the back plate of the camera to fit the film holder to allow attachment to the camera body.
This is the design for how the back plate will be built, not drawn to scale.
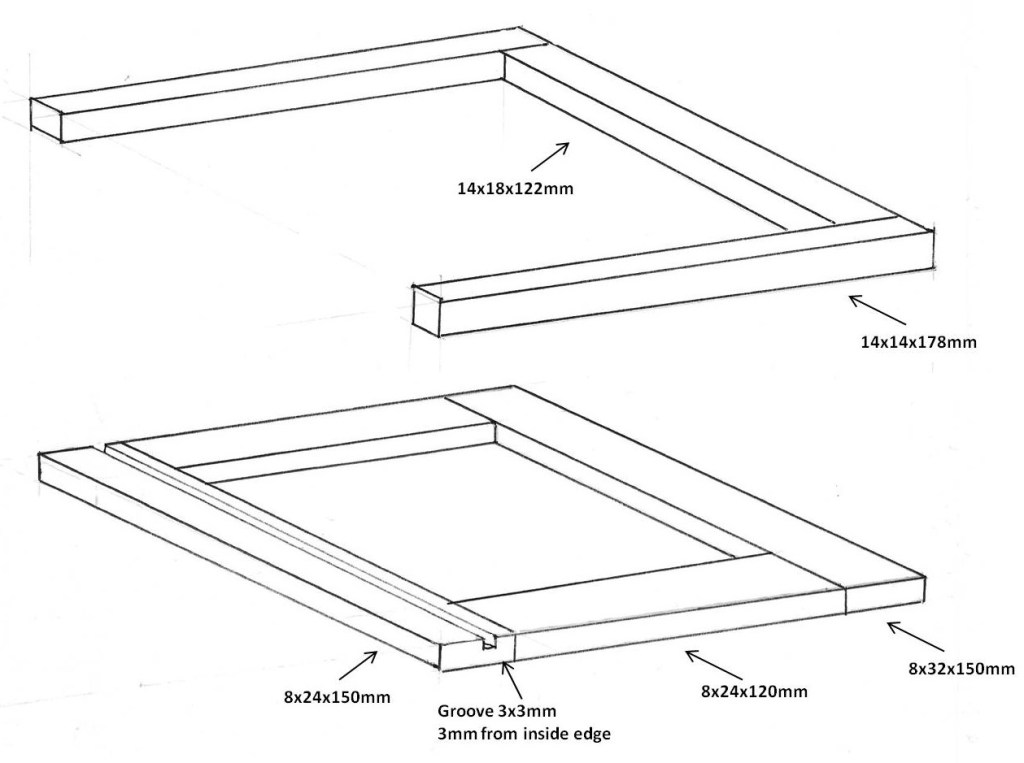
The timber I used was some hardwood that had been a doorframe in a previous life. I cut the pieces to thickness and width using a table saw and then to length with a mitre saw. A groove was cut into the piece marked ‘A’ with the table saw to accommodate the light trap ridge on the film holder.
The pieces were then glued together using pva glue and allowed to dry overnight before sanding to remove any excess glue and imperfections. The ends of the groove cut for the film holder ridge were filled with a plug of wood and glue.
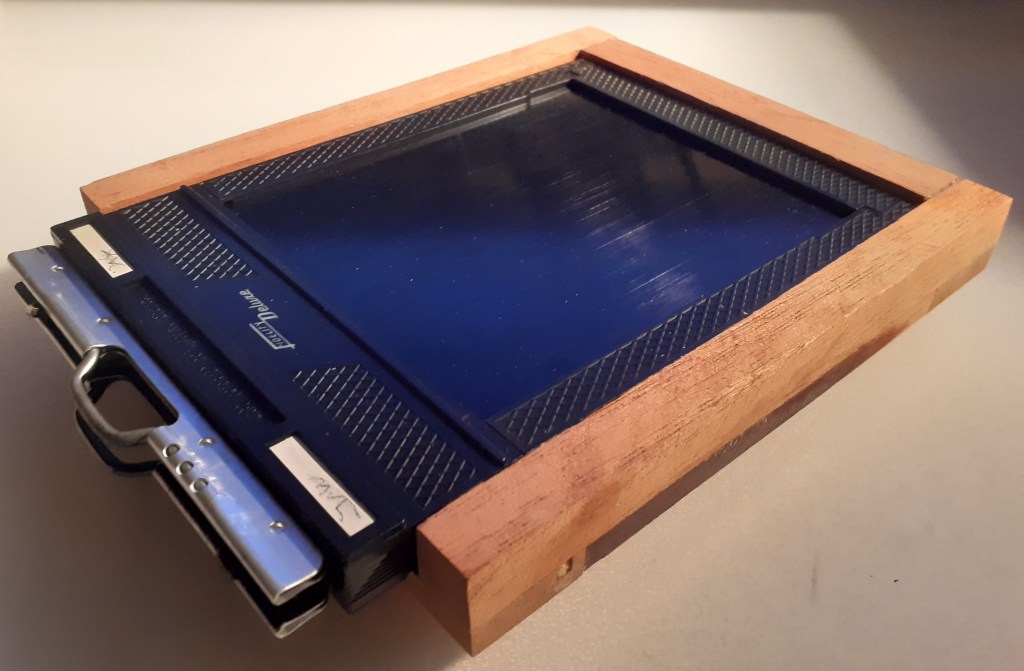
When I tried the film holder for size it fitted quite snugly with the ridge on the film holder slotting into the groove I had cut for it.
Then, strips of wood were glued to the front face of the back plate to act as a light trap when attaching the body. (As this is a pinhole camera I could also use black felt in these joints as the exact focal length is not critical although I believe the light traps once painted black will be sufficient). The strips were 8x10mm hardwood (outer) or 6x6mm pine (inner) because that’s what I had available. Importantly though, they were glued so as to leave a channel 8mm wide to accommodate the body which I will make out of 6mm MDF.
All the internal surfaces including the light traps will be painted with two coats of matt black paint to cut down reflections and to fill any gaps in the joints to prevent light leaks.
When in use the film holder will be kept in place with a piece of plywood and elastic bands. I cut a piece of 8mm plywood to size (150x178mm) and then drilled pilot holes to take screw-in eyelets. These are so I can thread the elastic bands through to make sure the back doesn’t fall off or move around too much. On the other side I glued some 2mm thick foam to apply gentle pressure to the film holder. I would have preferred black foam but blue was all I had.
Next time I’ll describe how I made the body and the front plate.
